

 Candy Organizer
Materials

You'll need
an empty cardboard candy box (any size)
newspaper, magazines, paper bags, wallpaper, wrapping paper, etc. (I chose newspaper so I could reuse two things at once)
scissors
pencil
paintbrush
waterbase sealer / glue
a ruler (or not, if you're lazy like me)
Step 1.
 Pick out the image you want for the top of the box. Measure the sides of the box and cut out your image making the piece 1" larger than your box measurements on all sides. (example: box is 4x4 cut out a 5x5 piece of paper). Glue the paper to the top of the box letting 1" hang over each side.
Step 2.
 Cut each corner of the excess paper not quite to the edge (you want there to be a little bit of paper to cover the corner). Fold and glue all the sides down over the edges. Fold and glue the corner pieces to the adjacent sides.
Step 3.
 Measure four (4) strips of paper for each side of the top with 1" of exess on the sides and bottom.
Step 4.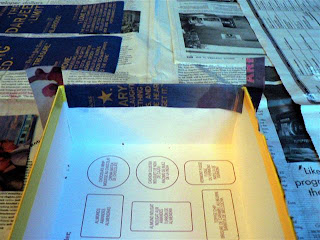 Glue the short sides first. Cut the excess paper not quite to the box, fold and glue over the edge to the inside. You can cut off those two hanging pieces before folding the excess over the edges and gluing onto the longer sides. Repeat for all other sides.
Step 5.
 When you are finished gluing all of your sides down you can cut out some shapes to decorate the top with if you like. (I didn't notice what the paper said when I took this picture but I like it!) Glue these shapes wherever you like on the top or sides of the box.
Step 6
 Repeat all step for the bottom of the box. Cut out some extra pieces to glue on the inside. I didn't worry too much about exact measurements here. I liked the way it looked better when I glued random pieces to the inside bottom and sides.
Step 7
 I made compartments for my box by cutting out pieces of cardboard the same length and width as the box, making a slit in each pieces, and connecting them together.
Voila!

i can't wait to try this! i may have to sacrifice some candies for the love of the project though because i don't have a box:( YAY.
ReplyDeleteI love yours. Now I REALLY want to make one. You "decorated" with such beautiful images.
ReplyDeleteCheers for us being on the same page!
I saw this and I thought you'd enjoy, they used a candy box & made a frame out of it:)
ReplyDeleteLink:
http://www.ljcfyi.com/2008/02/i-am-really-excited-about-this-project.html